
I absolutely adore making these Easy Popovers in a Muffin Tin Recipe whenever I want a simple yet impressive treat. From the moment they start puffing up in the oven, I know I’m in for a golden, crispy crust and a tender, custardy center that I can enjoy any time of day. Whether I’m serving them for a cozy breakfast or alongside a hearty dinner, these popovers always bring a bit of magic to the table. Plus, they’re made in a regular muffin tin, so no fancy equipment is needed—making them one of my favorite go-to recipes.
Why You'll Love This Easy Popovers in a Muffin Tin Recipe
What really makes this recipe stand out for me is the contrast of textures: the outside crisps up beautifully while the inside stays soft and almost custard-like. The subtle saltiness balanced with the rich buttery flavor feels comforting and satisfying every single time I bake them. I love how versatile they are, too; they pair wonderfully with sweet jams, savory spreads, or just a sprinkle of fresh herbs. It’s like a perfect little edible cloud that’s bursting with flavor.
Another reason I keep coming back to this recipe is how incredibly easy it is to prepare. I just whisk together a handful of simple ingredients, pop the batter into a preheated muffin tin, and let the oven do its magic. I don’t have to wait hours or fuss with complicated steps. These popovers are fantastic for last-minute brunches, holiday gatherings, or even casual weeknight dinners when I want something warm and special without the stress. Honestly, once you try this Easy Popovers in a Muffin Tin Recipe, it becomes a staple.
Ingredients You'll Need
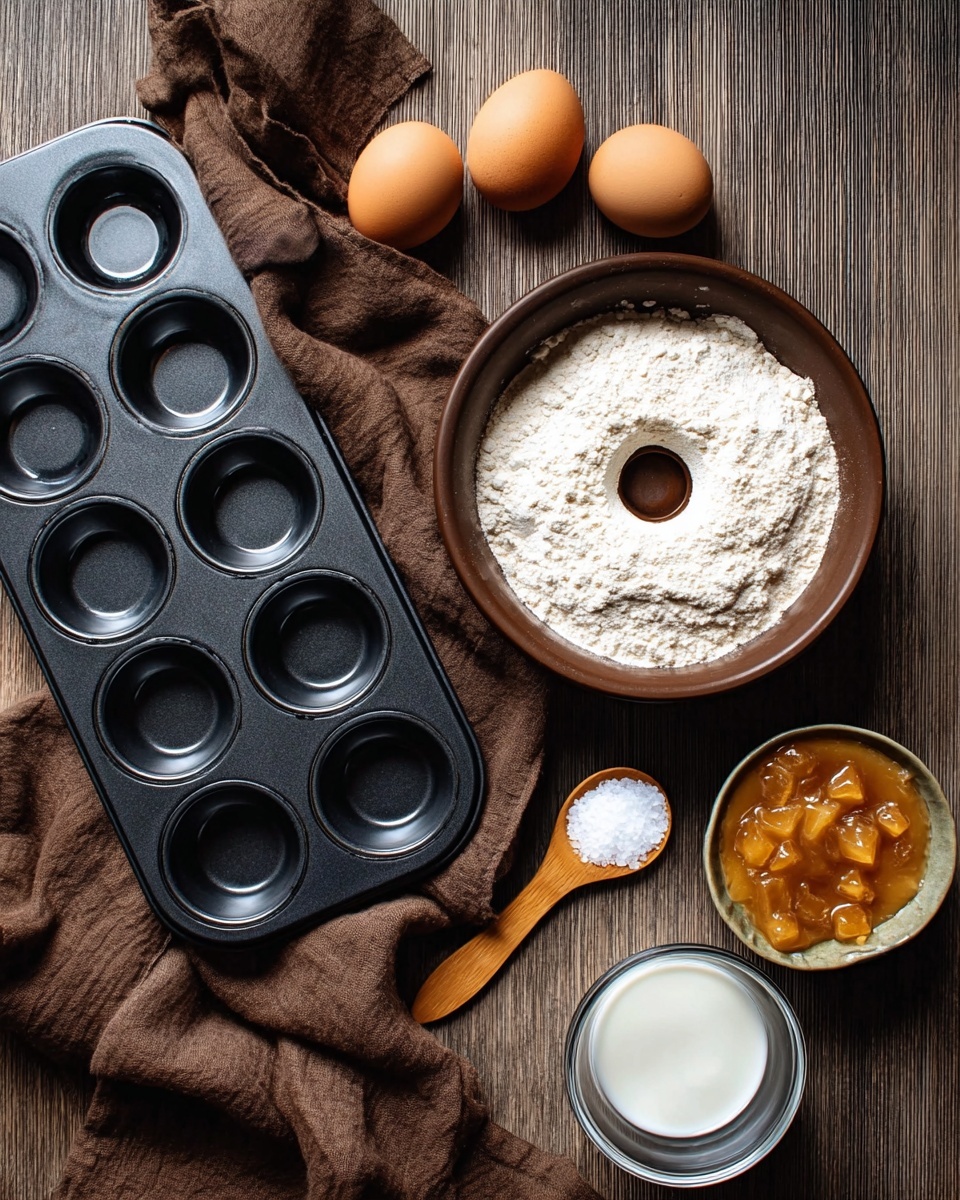
The ingredients for this recipe are wonderfully straightforward but essential to achieving those perfect popovers. Each one plays a key role in ensuring the right texture, flavor, and color. I always appreciate recipes like this because simple ingredients let the natural buttery richness really shine through.
- 3 large eggs: These provide structure and help the popovers rise beautifully.
- 1 cup whole milk (warm): Warm milk creates a tender, moist center and improves rise.
- 1 cup all-purpose flour: The foundation of the batter giving it body and texture.
- ½ teaspoon salt: Enhances all the flavors, balancing richness.
- 2 tablespoons unsalted butter (melted): Adds a luscious buttery note and helps crisp up edges.
- Nonstick spray or additional melted butter: Essential for greasing the muffin tin to prevent sticking.
Directions
Step 1: I start by preheating my oven to 450°F (230°C) and placing the muffin tin inside to heat up. This step is crucial because a hot pan helps the popovers rise dramatically.
Step 2: While the oven heats, I whisk together the eggs and warm milk in a large mixing bowl until the mixture becomes nice and frothy. This aeration helps with the light, airy texture I love.
Step 3: Next, I gradually add the flour and salt, whisking continuously to avoid lumps. The batter should look smooth and silky when it’s ready.
Step 4: Once the batter is smooth, I stir in the melted butter, which adds richness and helps give the popovers a beautiful golden color.
Step 5: Carefully removing the hot muffin tin from the oven, I immediately grease each cup thoroughly with nonstick spray or melted butter to ensure my popovers won’t stick.
Step 6: I pour the batter into each muffin cup, filling them only halfway so the popovers have plenty of room to puff up while baking.
Step 7: The popovers bake at 450°F for the first 15 minutes to create that initial explosion of rise. Then, I reduce the temperature to 350°F and bake for another 15 to 20 minutes until the popovers are golden brown and puffed.
Step 8: Once out of the oven, I let the popovers rest in the tin for just a minute before transferring them to a wire rack. They’re best served immediately while still warm and crispy.
Servings and Timing
This recipe yields 6 generous popovers, perfect for sharing at breakfast or as a side for two to three people. The prep time is a quick 10 minutes, and the total baking time takes about 30 to 35 minutes. Including a short resting time after baking, you’re looking at about 40 minutes from start to finish.
How to Serve This Easy Popovers in a Muffin Tin Recipe
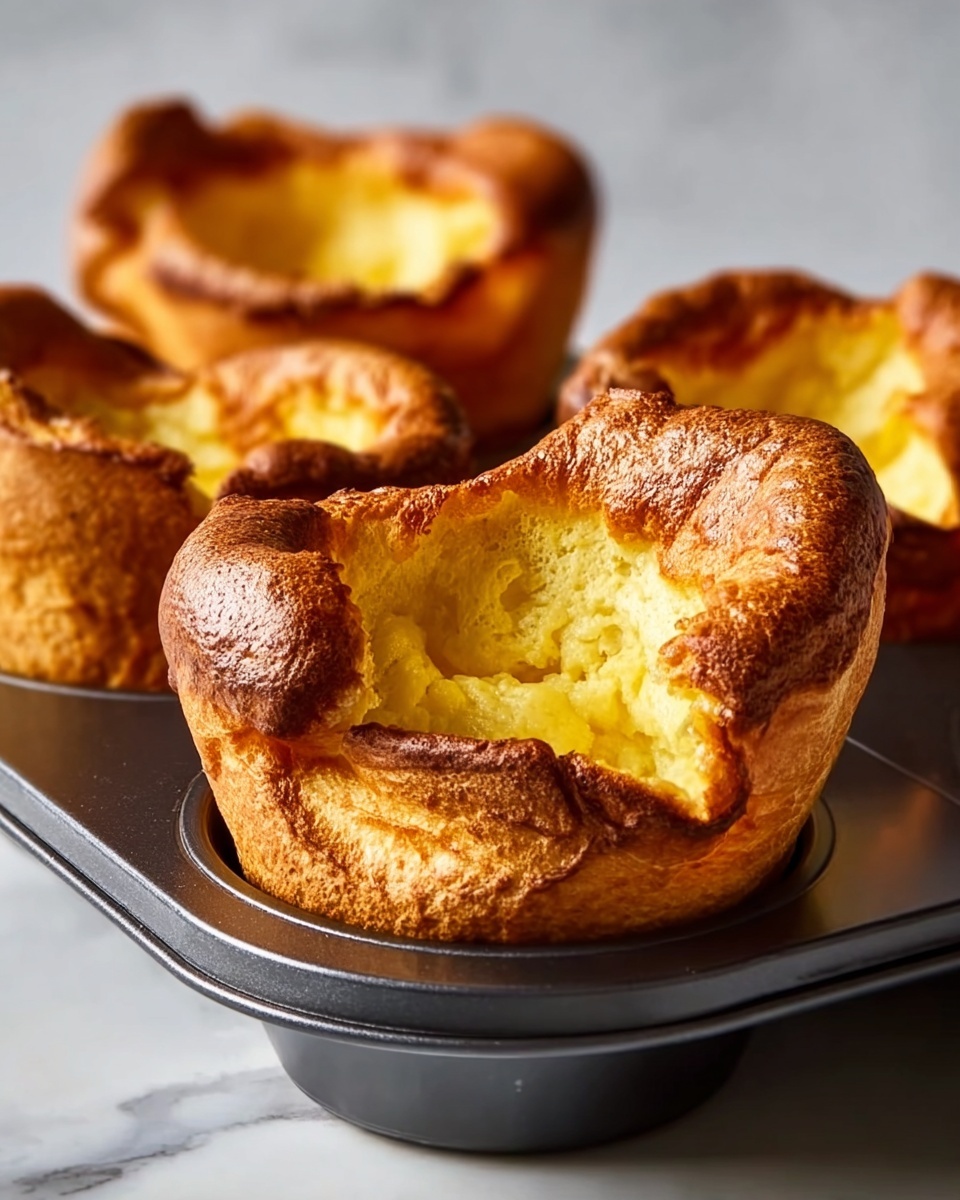
When it comes to serving these popovers, I love to keep things simple to showcase their airy texture. They’re fantastic with a pat of butter melting on top or a drizzle of honey for a sweet twist. If I’m going savory, I might add a sprinkling of fresh chives or even a bit of grated cheese melted on the side. They’re extremely versatile and pair beautifully with nearly anything!
I also enjoy presenting these popovers alongside scrambled eggs and fresh fruit for a comforting brunch. The popovers add a lovely textural contrast and can be torn apart and dipped into sauces or spreads, turning every bite into a little indulgence. For special occasions, I like to plate them with a small ramekin of herb butter or a citrusy jam for an elegant touch.
Beverage pairings can be as fun as the popovers themselves. For breakfast or brunch, a freshly brewed cup of coffee, a sparkling mimosa, or herbal tea complements them perfectly. At dinner, a crisp white wine or a light rosé highlights their buttery goodness, while sparkling water with a slice of lemon keeps things refreshing and bright. I find they really shine when served warm straight from the oven but also taste delightful at room temperature if you’re serving a buffet or party spread.
Variations
I love experimenting with this Easy Popovers in a Muffin Tin Recipe to suit different tastes and occasions. One of my favorite tweaks is adding grated sharp cheddar and chopped fresh thyme to the batter for a savory, herbaceous version. The cheese adds a wonderful depth of flavor, making the popovers perfect alongside a robust soup or stew.
If you need gluten-free popovers, you can substitute gluten-free flour blends that work well with baking. For a vegan adaptation, swapping eggs and milk can be trickier, but using plant-based milk and an egg replacer such as flaxseed egg can yield good results—though the rise might be slightly less dramatic. I also recommend experimenting with different fats, such as olive oil or coconut oil, for added aroma and depth.
For a sweeter twist, I sometimes add a teaspoon of vanilla extract and a tablespoon of sugar, turning these popovers into a lovely sweet treat for breakfast or dessert. You can even fold in fresh berries before baking for a fruity surprise. Though I prefer baking them in a muffin tin, some have success with popover pans or even ramekins for a slightly different shape but equally delightful puff.
Storage and Reheating
Storing Leftovers
If you happen to have any leftover popovers, I recommend storing them in an airtight container at room temperature for up to two days. I avoid refrigeration because that can make them soggy and lose their crispness quickly. To keep their texture as close to fresh as possible, wrap them loosely in foil or parchment paper.
Freezing
Popovers freeze reasonably well if you want to save some for later. I let them cool completely, then wrap each one tightly in plastic wrap and place them in a freezer-safe ziplock bag or container. Frozen popovers are best enjoyed within one month. When ready to eat, thaw them at room temperature for about 30 minutes before reheating.
Reheating
To reheat and regain that beautiful crisp exterior, I always recommend using an oven or toaster oven at 350°F for about 5-7 minutes. Avoid microwaving if you want to maintain texture as it can make them chewy or soggy. I find that reheating on a wire rack lets the heat circulate evenly and keeps the crust perfectly crisp while warming the custard-like interior.
FAQs
Can I use a different type of flour for this recipe?
Yes, you can substitute all-purpose flour with pastry flour for a slightly lighter texture or gluten-free flour blends if you need a gluten-free option, but expect a minor change in puff and texture.
Why do I need to preheat the muffin tin?
Preheating the muffin tin jump-starts the rising process by creating steam as soon as the batter hits the hot surface. This helps achieve beautiful, tall popovers instead of flat ones.
Can I add flavors or mix-ins to the batter?
Absolutely! Adding herbs, cheese, or even spices can personalize these popovers. Just fold in grated cheese or chopped herbs right before pouring the batter into the tins for best results.
Why did my popovers collapse after baking?
This often happens if you open the oven door during the first 15 minutes of baking or if the muffin tin wasn't hot enough at the start. Avoid peeking early and make sure your oven is fully preheated to prevent collapsing.
Can popovers be made ahead of time?
You can prepare the batter in advance and refrigerate it for up to 24 hours before baking, but for the best puff and texture, I recommend baking them fresh right before serving.
Conclusion
I hope you enjoy making and sharing this Easy Popovers in a Muffin Tin Recipe as much as I do. They’re such a joyous treat to pull from the oven—crispy on the outside, soft and airy inside, and perfect for any meal of the day. Give them a try and watch how effortlessly they become a beloved favorite in your kitchen, just like they are in mine!
PrintEasy Popovers in a Muffin Tin Recipe

These easy popovers baked in a muffin tin develop a golden, crispy crust with a soft, custardy interior. Ideal for breakfast, brunch, or as a savory side, this recipe requires no special equipment and yields light, airy popovers every time.
- Prep Time: 10 minutes
- Cook Time: 30 minutes
- Total Time: 40 minutes
- Yield: 6 popovers
- Category: Breakfast
- Method: Baking
- Cuisine: American
- Diet: Vegetarian
Ingredients
Popovers
- 3 large eggs
- 1 cup whole milk (warm)
- 1 cup all-purpose flour
- ½ teaspoon salt
- 2 tablespoons unsalted butter (melted)
- Nonstick spray or additional melted butter for greasing
Instructions
- Preheat Oven and Muffin Tin: Preheat your oven to 450°F (230°C) and place the muffin tin inside to heat thoroughly. This ensures the batter begins cooking immediately upon contact, encouraging a good rise.
- Mix Wet Ingredients: In a mixing bowl, whisk together the eggs and warm milk until the mixture turns frothy, which adds air and lightness to the batter.
- Add Dry Ingredients: Gradually add the flour and salt to the wet ingredients, whisking continuously until you achieve a smooth, lump-free batter.
- Incorporate Butter: Stir in the melted butter to provide richness and help create a tender crumb.
- Prepare Muffin Tin: Carefully remove the hot muffin tin from the oven and grease each cup thoroughly with nonstick spray or melted butter to prevent sticking and support rise.
- Fill Muffin Cups: Pour the batter into each cup, filling them about halfway to allow room for the popovers to puff up.
- Bake: Bake at 450°F for 15 minutes to set the structure and encourage puffing. Then reduce the oven temperature to 350°F and continue baking for an additional 15 to 20 minutes until the popovers are fully puffed and golden brown.
- Rest and Serve: Let the popovers rest for 1 minute in the pan, then transfer them to a wire rack to cool slightly. Serve immediately for the best texture.
Notes
- Always preheat the muffin tin before adding batter to ensure the popovers puff properly.
- Avoid opening the oven door during baking to prevent the popovers from collapsing.
- For extra flavor, mix in grated cheese or fresh herbs into the batter before baking.



Leave a Reply